

# Getting Started
Quickly set a project up, upload and annotate data, and export the result.
You can watch this video (opens new window) for a full demonstration of everything in this guide.
# Sign up
Go the sign up page (opens new window) and follow the prompts to create an account.
# Create Project
Once you have registered an account, you can create a project by clicking the plus icon ( + ) found on the navigation bar.
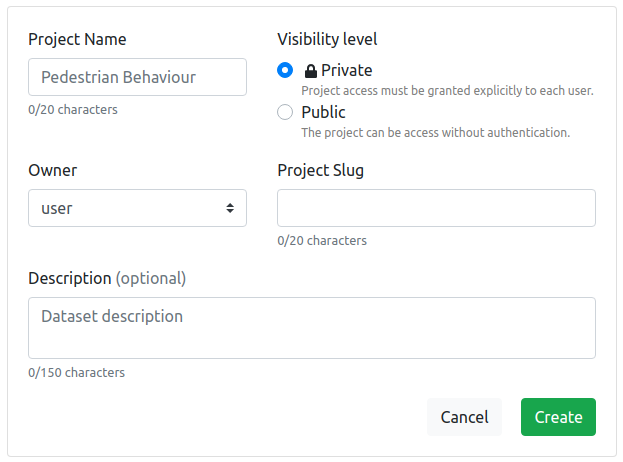
Once you have created your project you will be redirected to the home page.
# Upload Data
The fastest way to create a dataset ready for annotation is by going to the Datasets tab, creating a new dataset, then uploading files in the modal that appears immediately after creating the dataset:
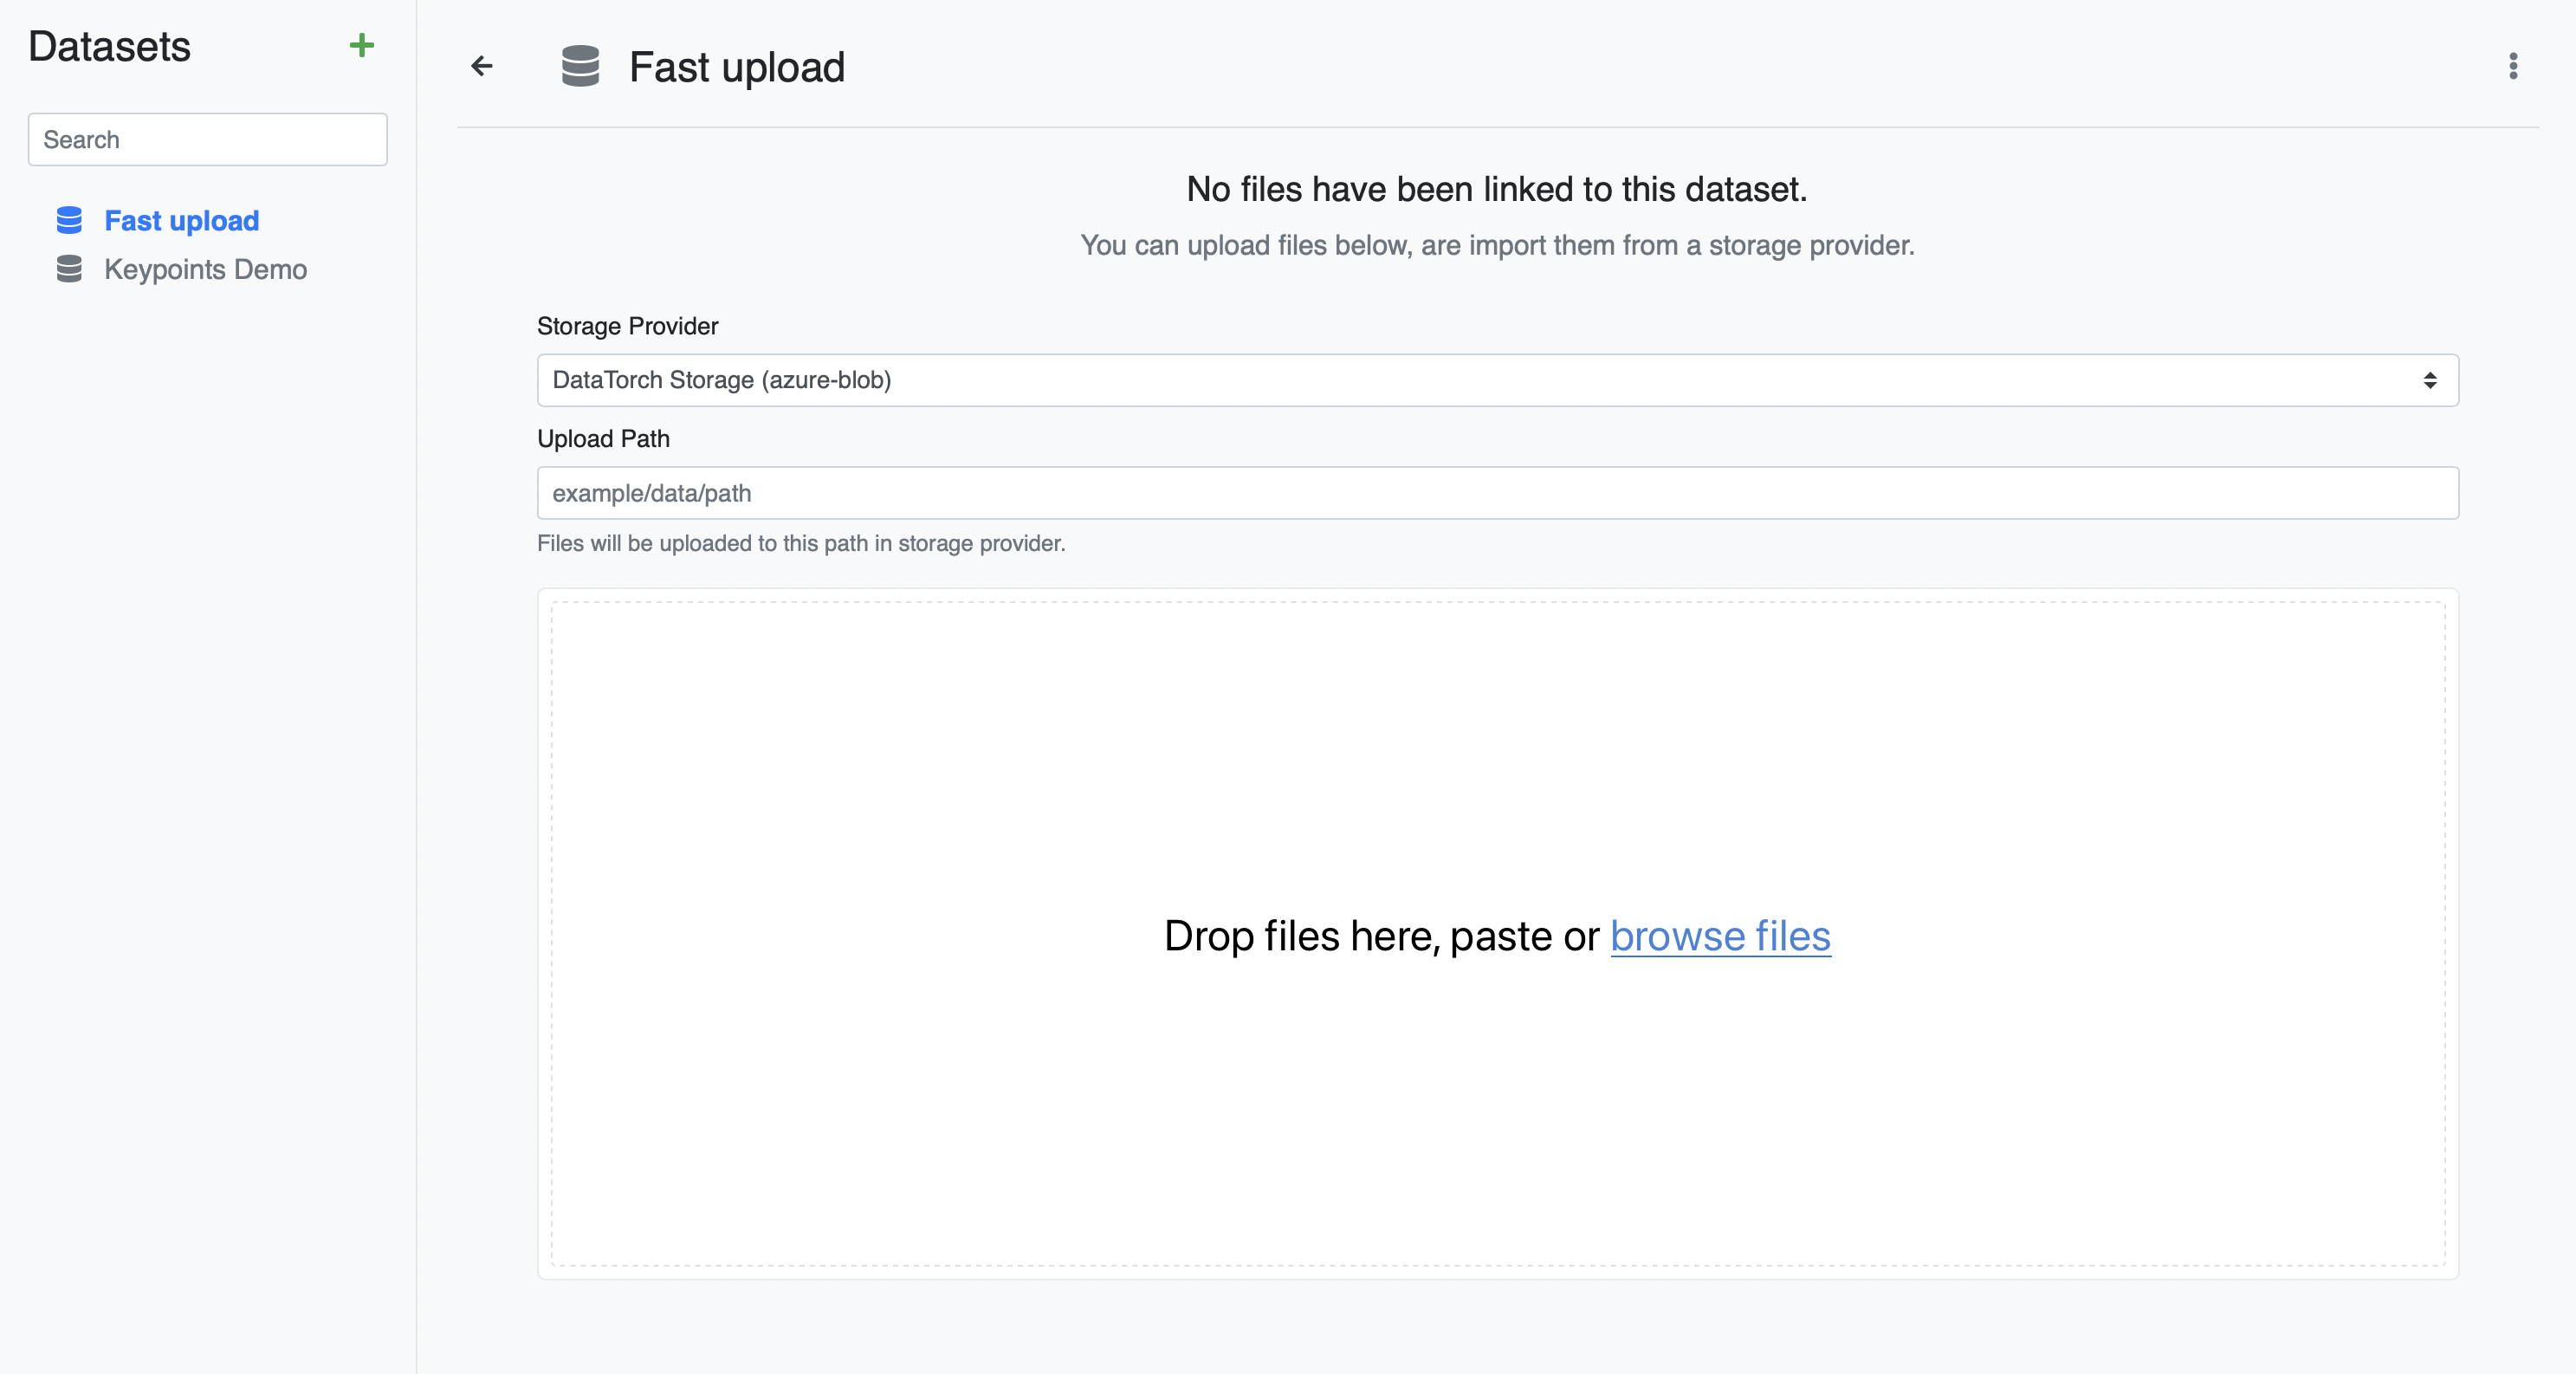
Each project is provided with an Azure storage account as the default Datasource, so there is no additional setup required.
# Annotate Data
Click on your file in the Dataset to enter the annotator.
In the upper right corner, you will see the active label for annotation.
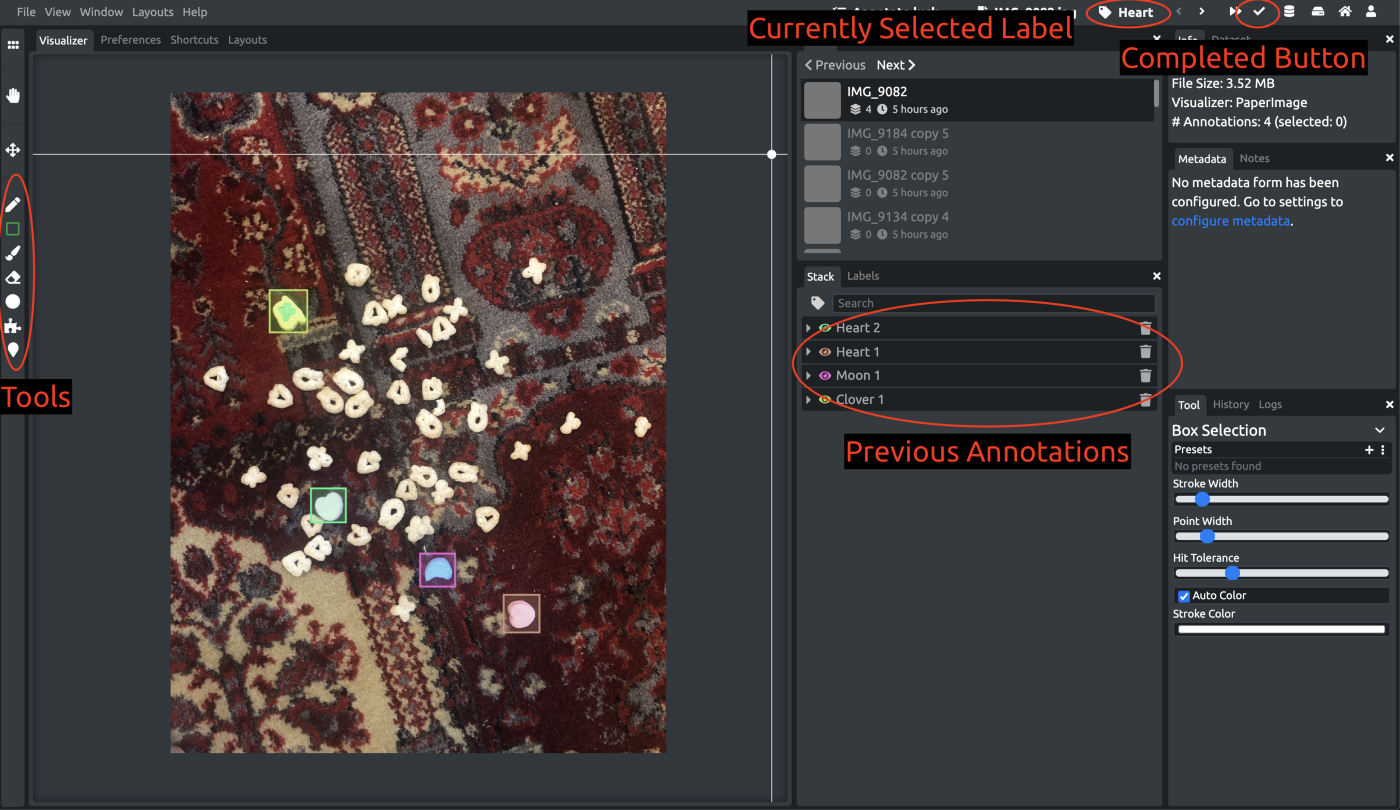
We havent created any labels yet, but you can do so directly in the annotator by pressing 'q' on your keyboard.
Select your newly created label as the active label, then use the tools on the toolbar on the left to start annotating.
# Download Annotations
DataTorch generates exports based on something called schemas, which are essentially conditional statements that define the annotations and files which you want to include in your export.
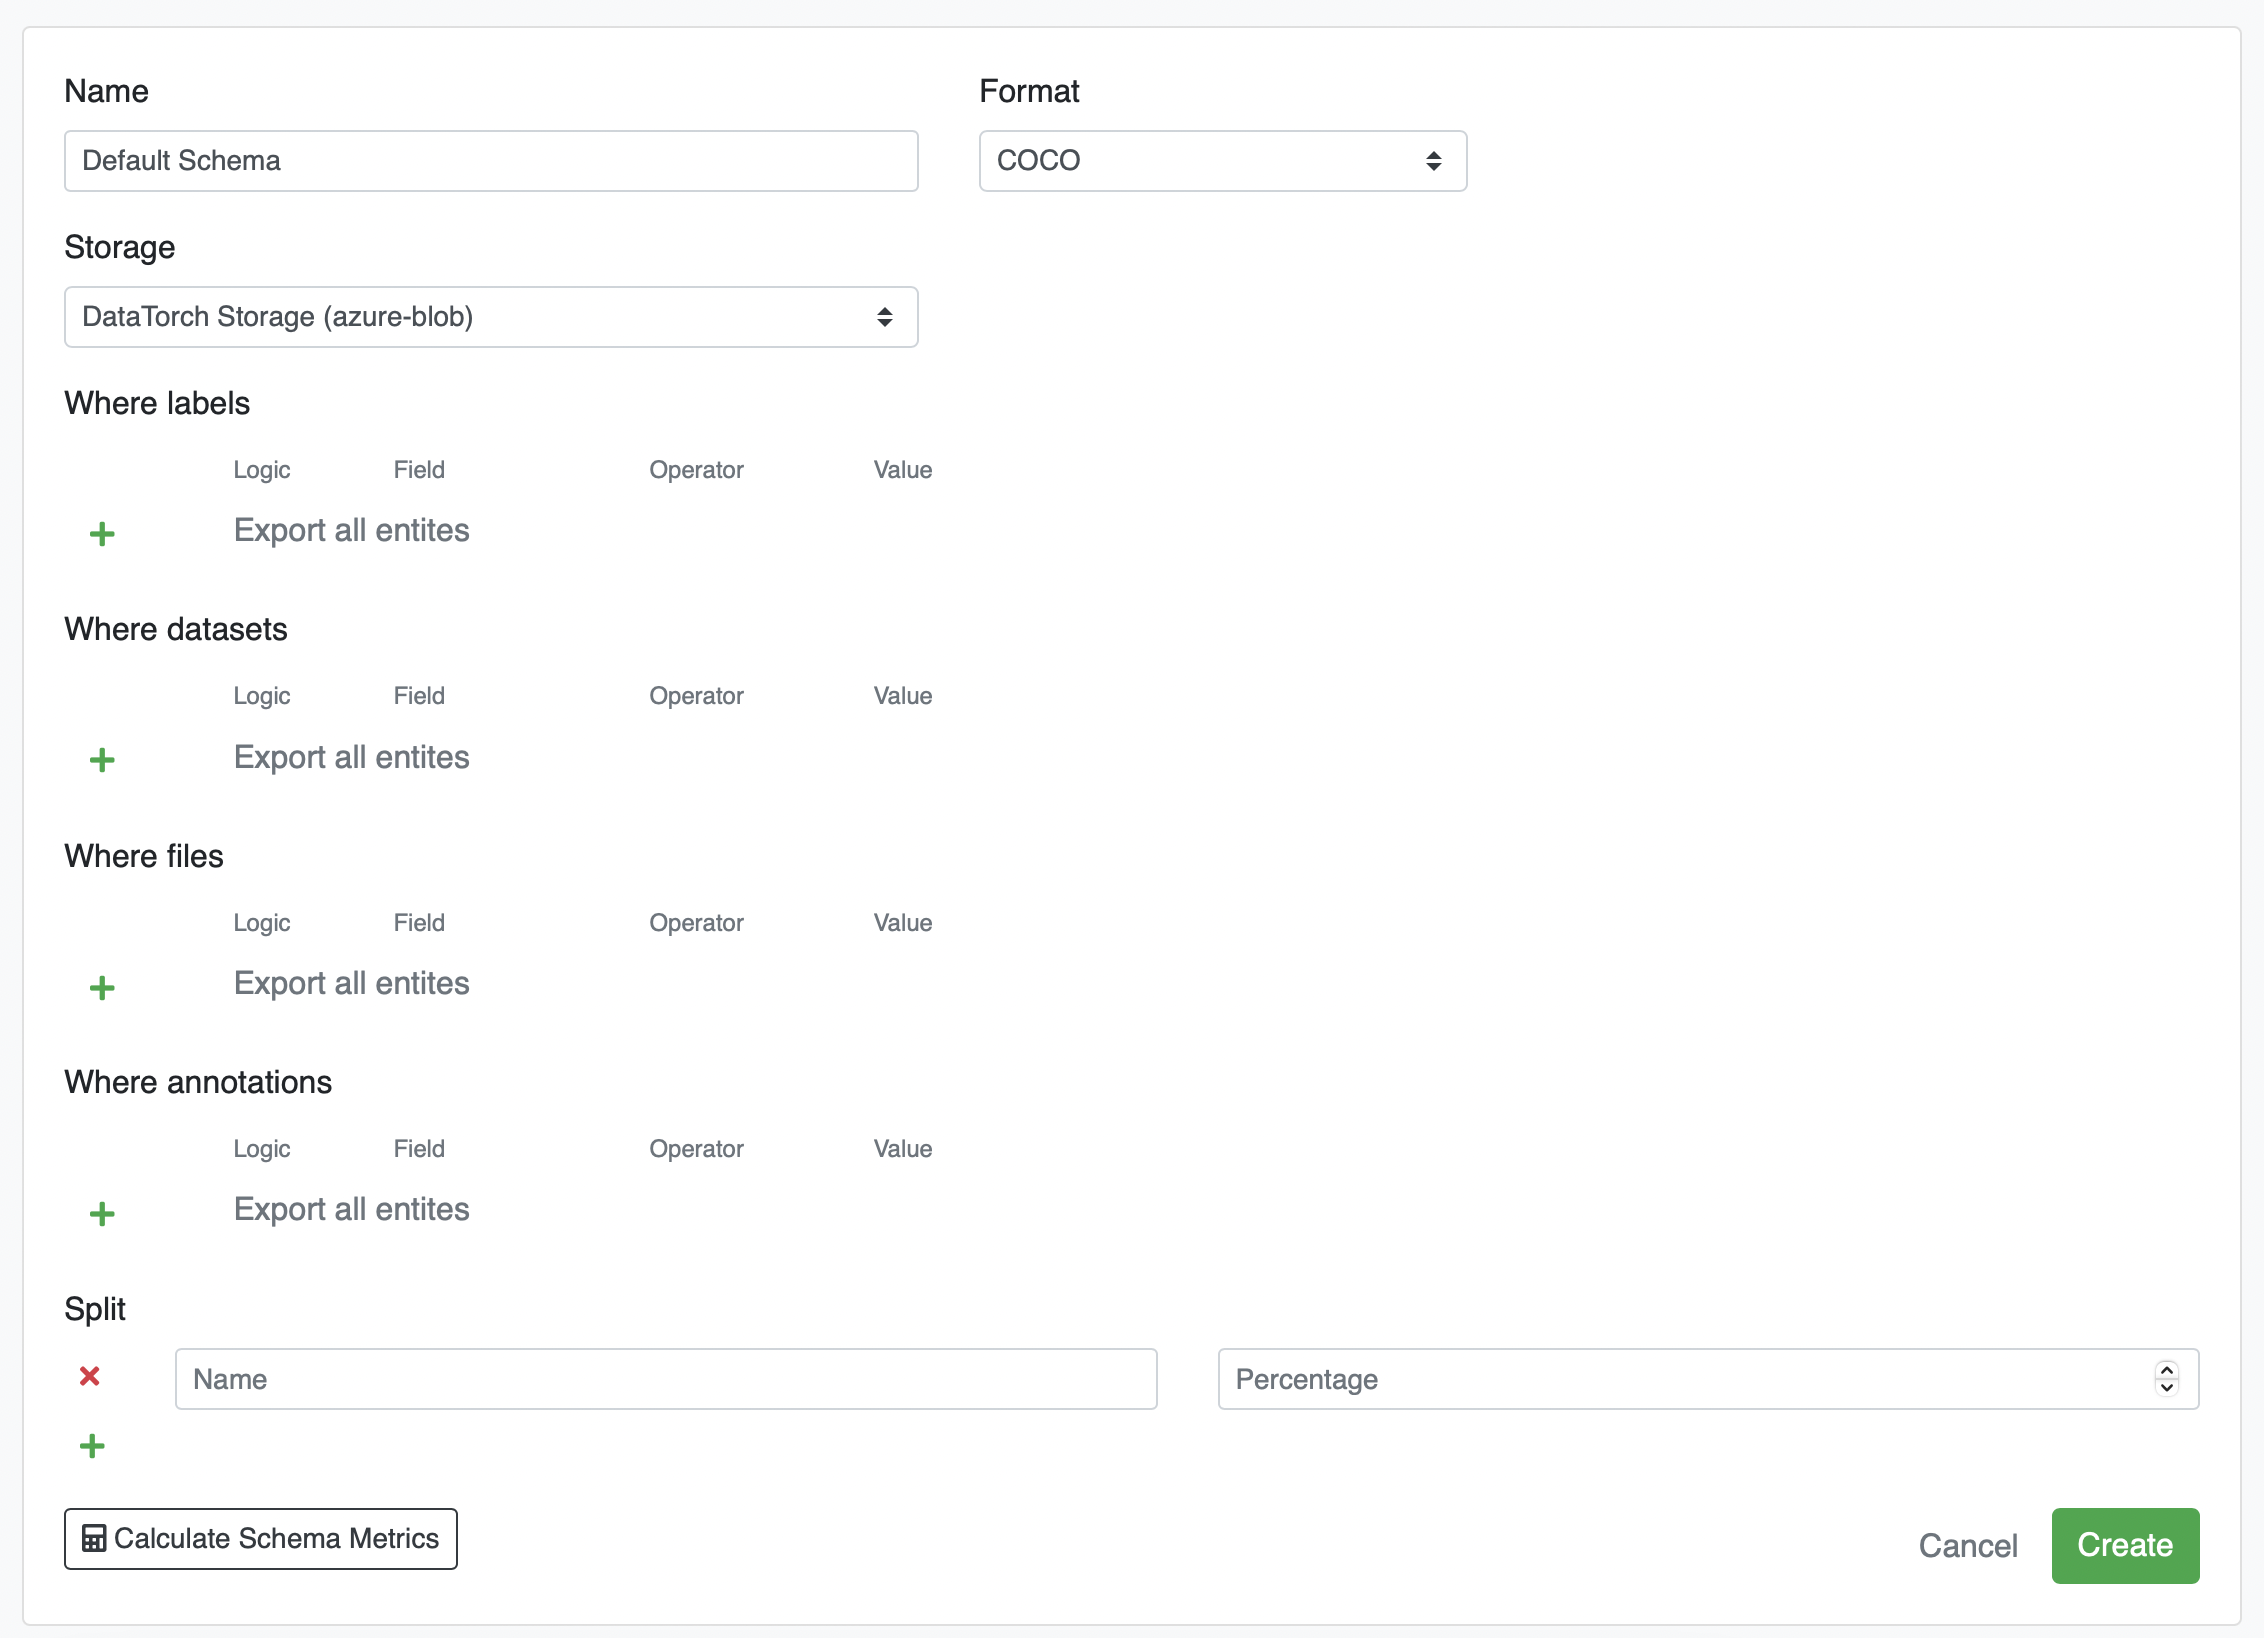
# Create Export Schema
In project page, click “Exports” then “New Schema”.
Name the new schema whatever you want, change the Format to COCO, and leave Storage as is.
You can create conditions here, but if you leave everything else alone, the schema defaults to exporting all annotations.
Finally, click “Create” to create your schema.
# Run Schema
Once the schema is created, click on it, then click “Run Export” to tell it to execute.

Depending on the size of the schema, it might take some time to run, but the State indicator will change depending on the status. When it says “Success”, click on it and then click the “Download” button in the top right corner. Your COCO JSON file will download with all of the annotations included!
← Introduction Overview →