
# Set up a collaborative project in DataTorch
Create a project, invite collaborators, and give them different permissions as a prelude to data annotation work.
# Create Project
Create a project. Since we are going to have users with different permissionns, set the visibility to 'Private'.
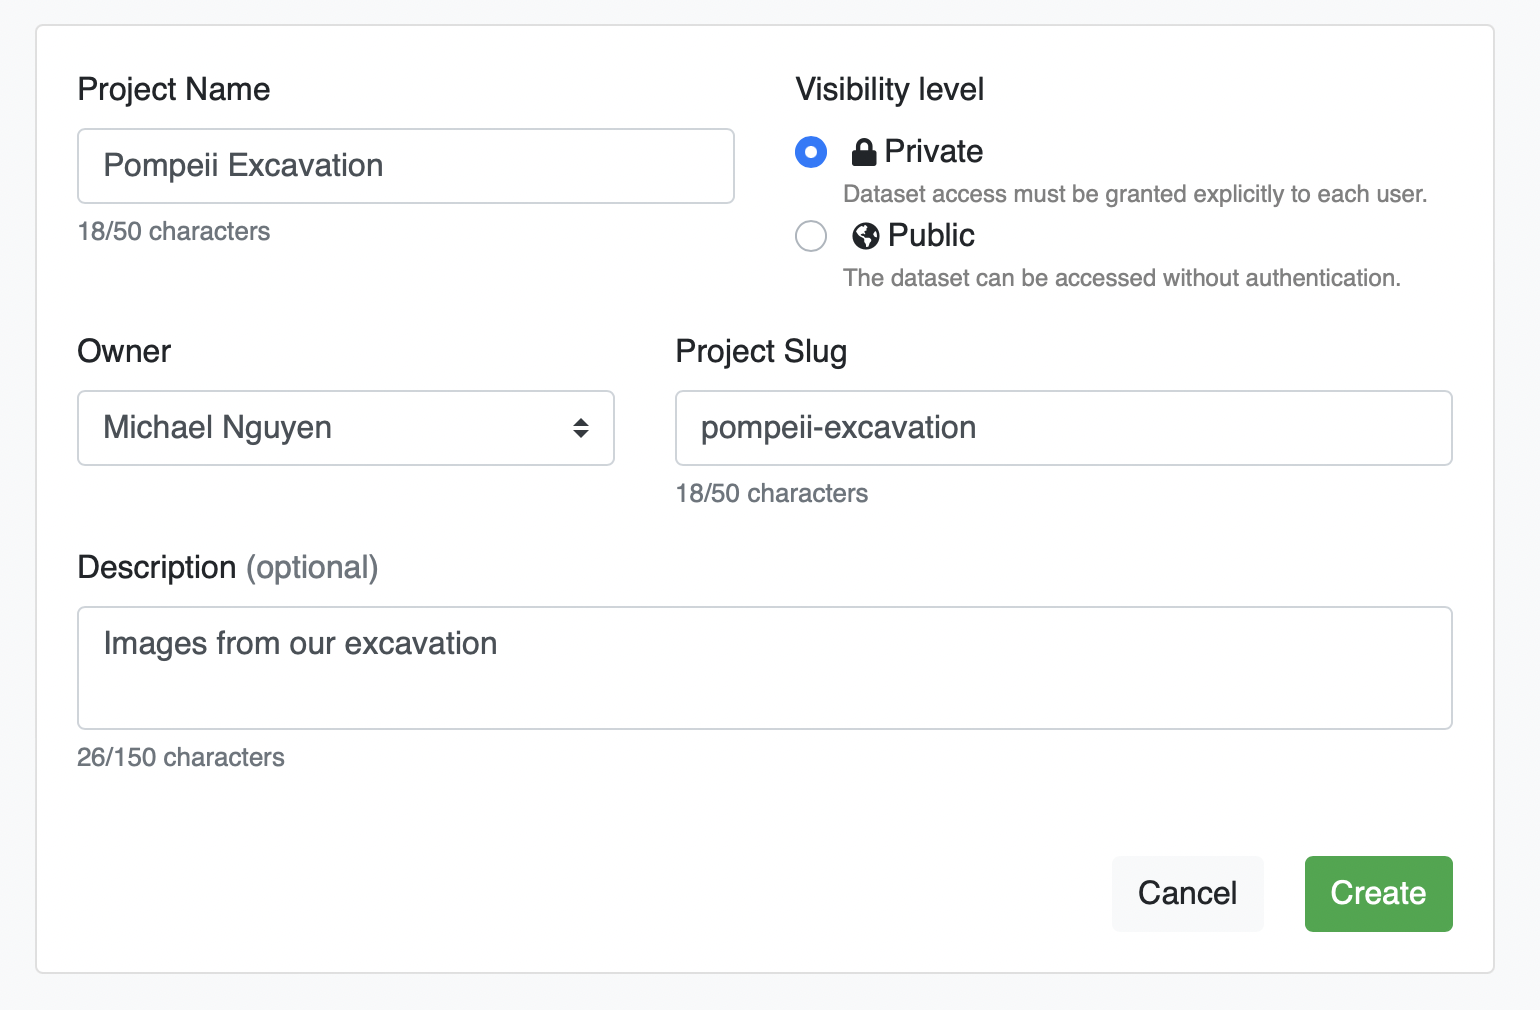
Once it is created, it will take us to the Project Summary page.
# Optional: Upgrade Account
DataTorch is free for personal use, and you are able to add up to 2 more collaborators for free to any private project.
However, if you wish to go beyond this limit, you will have to upgrade to a Pro account. Click your user icon in the upper right corner, then click "Upgrade" and follow the prompts.

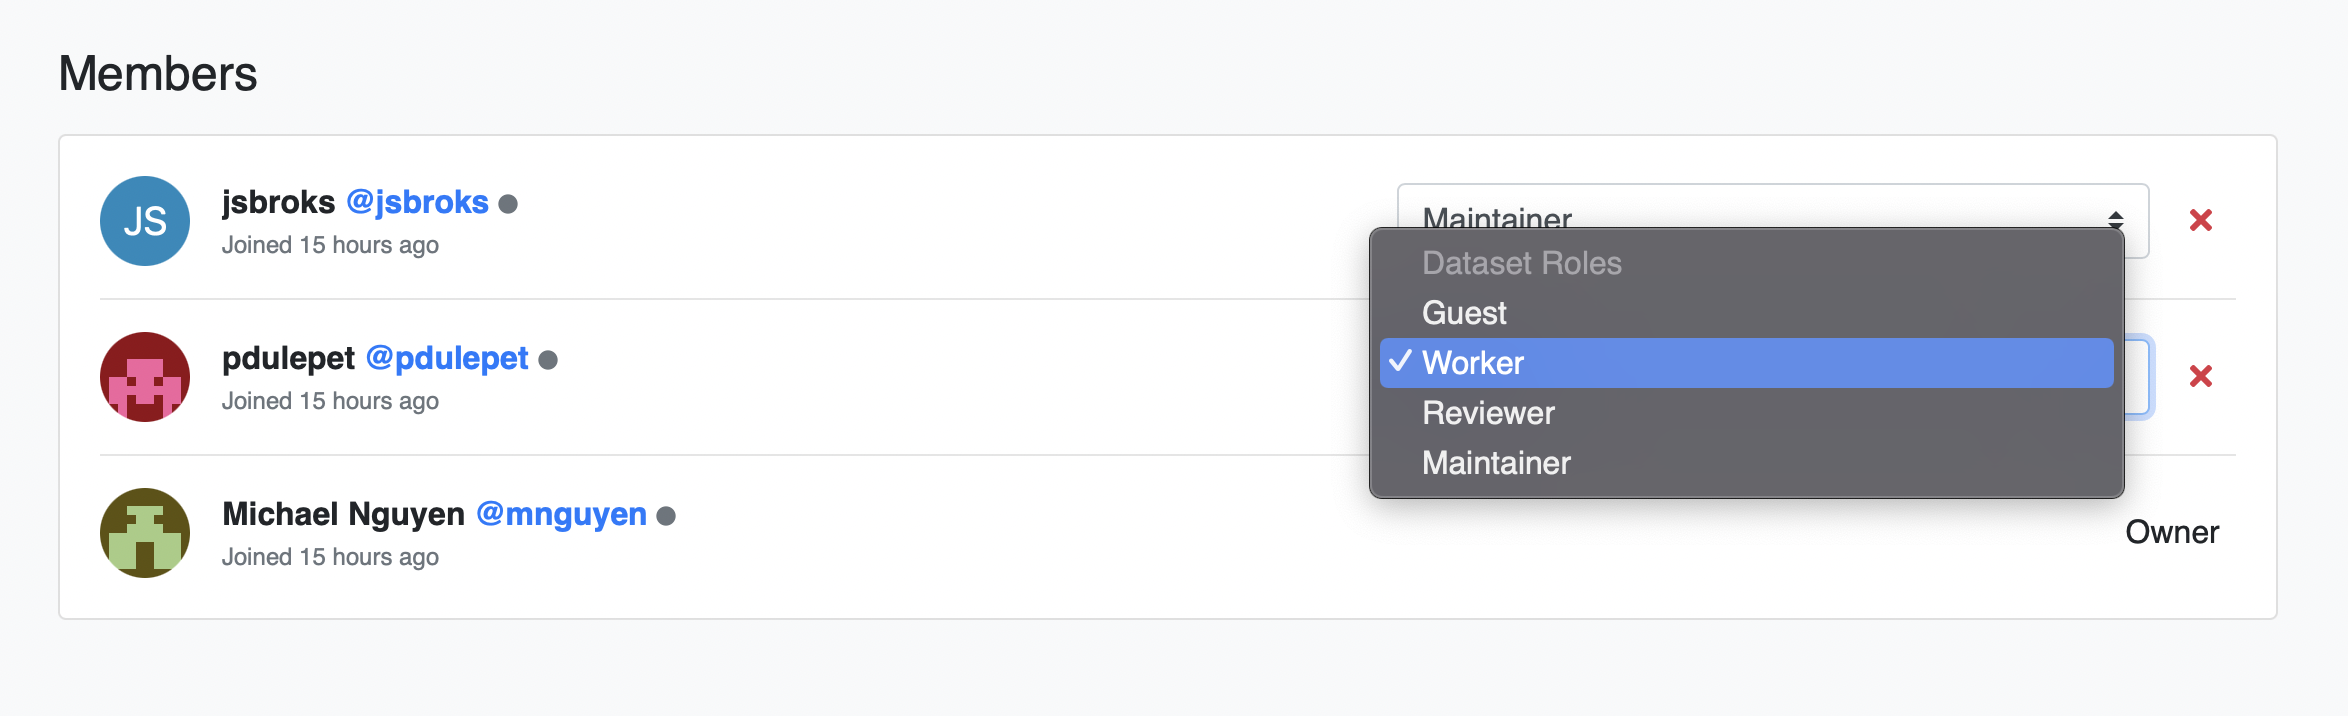
# Add collaborators
While in the Project page, click "Members" at the bottom to invite collaborators to your project. Each of your collaborators must have an existing DataTorch account.
Type the usernames of any accounts you wish to add to the project, and click the "Add" button within the input to add them to the selection group. Select a permission group for selected users (we can change it later), then click the green "Add" button.

Even though our project is private, when they log in, they will now be able to see the project.
# Manage Permissions
You should now see the users you just added appear under the Members header.
To change permissions, simply click the drop down next to the user you wish to edit and select the appropriate permission. It will update automatically.
Learn more about permissions →
# Next Steps
Congrats! You have created a new DataTorch project with multiple users and permissions. All you need to do now is add data to the project to start annotating.
# Create dataset with mutiple filesources
Create a dataset in your project that consolidates data from different storages.