# How to Annotate using Keypoints tool in DataTorch
Before we can use the Keypoints tool, we will need to create a keypoint-compatible label, by adding additional metadata to the label. This metadata is a JSON object that details the keypoint skeleton for each instance of that label, in COCO format.
# Create a Keypoint-compatible Label
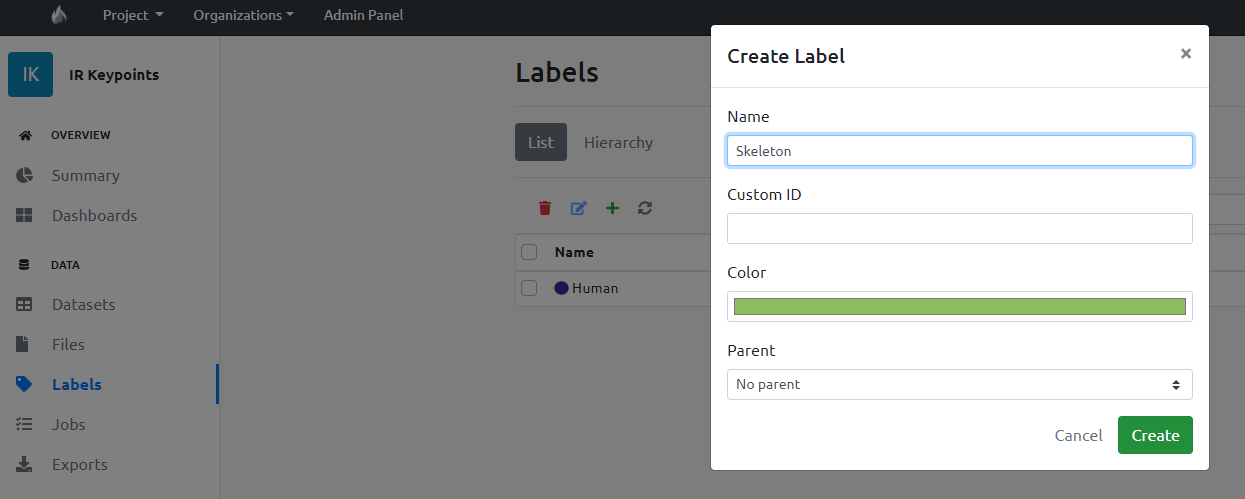
First, go to the Labels Tab and create a new label. In this example, we will create a label and call it "Skeleton".
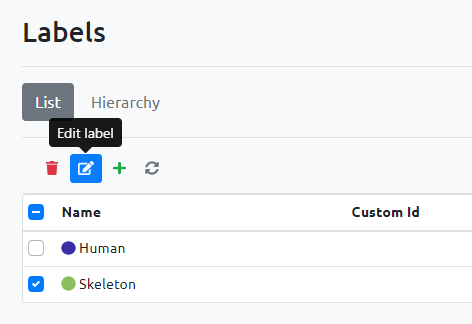
After the label is created, select it by checking the checkbox next to it, then click on the "Edit Label" icon. This is where we will add the metadata.
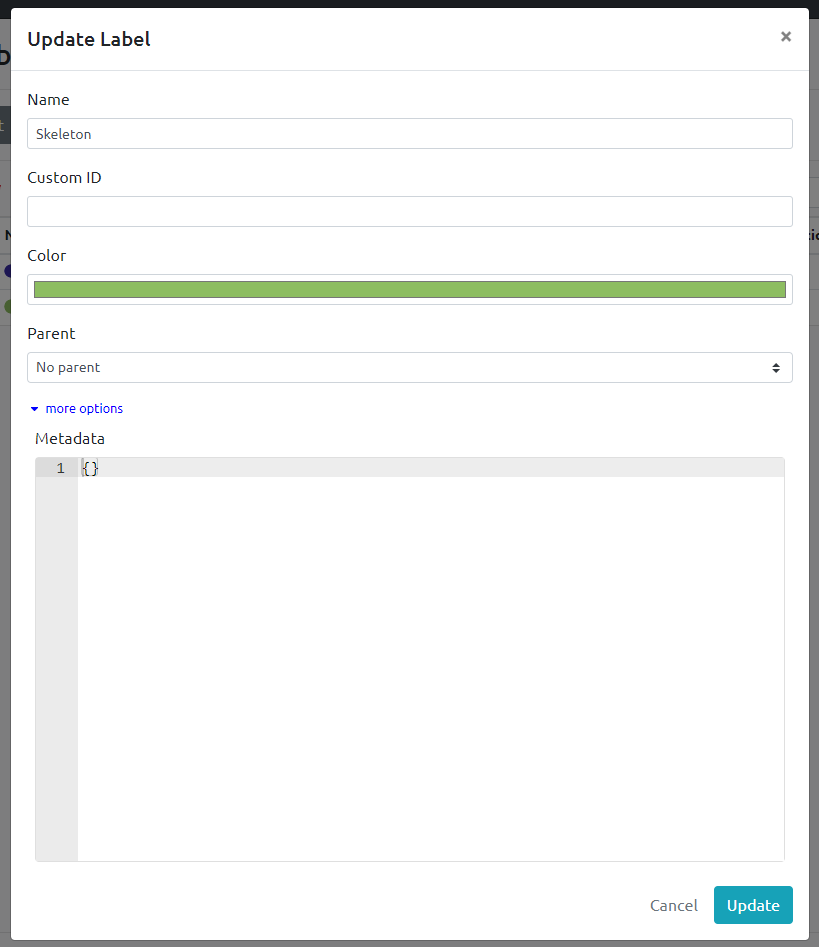
In the Update Label modal, click the "More Options" dropdown and you will see the input field for Metadata.
# Describe the Keypoint Structure in COCO Format
In this metadata section, we will create a JSON object that adds two additional fields to the label. These two fields are the ones required to describe keypoint annotations in COCO format: "keypoints" and "skeleton".
For more information, you can read in-depth about the COCO keypoint format here (opens new window), but in simple terms:
The "keypoints" property is an array of strings that name each keypoint you want to define.
The "skeleton" property describes the connections between the keypoints, by using numbers that correspond to the keypoints in the order that you define them in the "keypoints" property.
In the following example, the metadata describes a label containing 4 keypoints named "top", "left", "right", and "bottom". The keypoints are connected in a way that is essentially a square:
Simple Four-Point Keypoint Annotation Metadata Example
{
  "keypoints": [
		"top",
		"left",
		"right",
		"bottom"
	],
	"skeleton": [
		[1,2],
		[1,3],
		[2,4],
		[3,4]
  ]
}
Here is a more complicated example that describes a human skeleton for pose estimation:
Skeleton Keypoint Annotation Metadata Example
{
  "keypoints": [
    "nose",
    "left_eye",
    "right_eye",
    "left_ear",
    "right_ear",
    "left_shoulder",
    "right_shoulder",
    "left_elbow",
    "right_elbow",
    "left_wrist",
    "right_wrist",
    "left_hip",
    "right_hip",
    "left_knee",
    "right_knee",
    "left_ankle",
    "right_ankle"
  ],
  "skeleton": [
    [16, 14],
    [14, 12],
    [17, 15],
    [15, 13],
    [12, 13],
    [6, 12],
    [7, 13],
    [6, 7],
    [6, 8],
    [7, 9],
    [8, 10],
    [9, 11],
    [2, 3],
    [1, 2],
    [1, 3],
    [2, 4],
    [3, 5],
    [4, 6],
    [5, 7]
  ]
}
We will be using the four-point keypoint annotation for simplicity's sake. Add the metadata to the field and click "Update".
# Annotate with the Keypoint Tool
Now that the label has the additional metadata defined, we are ready to annotate it using the Keypoint tool in the annotator. After navigating to your file and entering the annotator, make sure the correct label is selected in the upper right corner of the annotator. If it is not, click on the label icon then select the appropriate label.
Afterwards, click the Keypoints icon in the toolbar on the left side of the screen.
You should see the name of your first keypoint above your mouse cursor. Simply click through the keypoints in the order that you defined them and the label will automatically generate and show up in the label stack after cycling through all of the points.